Showing posts with label House. Show all posts

Decorating.....

Bye Bye Dragon

Everything Being Moved

All This Lot Had to Be Moved

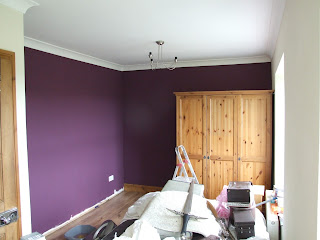
New Colour On The Walls

Last Bit of Painting

Putting the Room Back Together


The Study End


Lovely Views

Final Layout
What a depressing Summer, we are all enduring this year. The Rain just keeps on falling and falling. I feel sorry for all the people that are getting flooded. Certain parts of Wales are on Amber Alert for more flooding this weekend. Hopefully, forewarned is forearmed.
Because of the weather, I've not been able to work outside, so decided that I start decorating indoors instead. I was going to do the decorating in the Winter!!!!. The first room to get a complete make over was Ben's Room. I've completely reconfigured, the sleeping end of his room. It looks so much better now and we've even been able to fit in another wardrobe, it seems to have opened up the room and he'll now have more space to move around in there. Ben choose the colour and I did the rest. I just need to get him a new Chest of Drawers and a Bedside Cabinet as the ones in there, are just about holding together. A trip to Ikea, is in order. I was lucky with the headboard, that was originally off my old bed and had been stored in the Barn. After a through good clean, it came up lovely and saved me having to buy one.
Harry's Room, is now under going a make over...

Storage Corner..

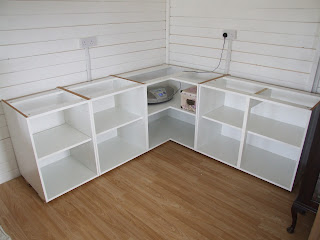
We had some left over kitchen cabinets from when we did the Utility Room & Kitchen indoors. So I decided to use them in the cabin for Storage. Waste not, want not.
I've put them in on wood supports, as I wanted the units low, so I can put a couple of the bigger Houses on top. If I'd have used the legs that came with them the units would be too high. Its also a perfect height to use as a work top table, sitting in a chair. The Corner Cabinet, is not going to have Doors, as its awkward getting bits and pieces in there. I may put a Curtain of material on there later.


I'm still slowly moving bits and pieces in and sorting them out. Its taking hours, but I'm determined, that it will be neat and tidy in there and I'll know where everything is, eventually!..

Mum's House

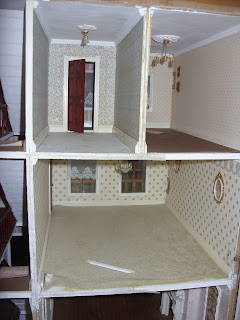
On the 21st March, I finally unpacked and unwrapped, my Mum's Dolls House. Its been sitting, waiting, in my Garage for the last seven years, to see the light of day. There was some minor damage, but nothing that cannot be fixed.
It was a bitter sweet moment for me, as my Mum never saw her house finished before she died.
The House is huge and opens front and back.  It stands approximately 4ft High and is approximately 3ft wide, so it sits on its very own little cupboard, that is on castor's.
There are internal walls and rooms behind rooms, just like in a real house. Hence, why it opens front and back.
So it's up to me to finish it. Quite a daunting prospect to be honest. But I'm looking forward, to putting all the wonderful miniatures that Mum brought, back in their rightful place.




Dad's Cabinet


When we moved to Wales, I brought quite a bit of furniture, from my Mum & Dad's House, with us.
My Dad collected Stamps, and this big old Cabinet, was where he stored his Stamp Albums. I wanted to give it a make over, so that I could use it to put my Room Boxes and Vignettes in.
Well it turned out to be a mammoth job. The way the Cabinet is built, it is impossible, to remove the Glass sliding doors. So it was a case of keep moving the glass, to get to a bit, that hadn't been painted.


I gave the whole Cabinet a light sanding and then a coat of undercoat, but the wood showed through. tried another coat and still the colour came through. Eventually, I had to buy another tin of undercoat, that is especially formulated for dark furniture. Although when I put it on, it drys like Battleship Gray. Then its had a top coat of Satin Wood Paint. I'm really pleased with how its come up. I've also rubbed down, one of my old Dining Room Chairs and that's having a make over as well...

Broken Flaps....


I popped into our local charity shop a few weeks ago and while I was there I spied a small table, but didn't take much notice of it. As it was standing outside the shop, with a load of other stuff all around it. I could see that it was a small size with two drop leafs.
The following day, I was talking to my mate Tash, (otherwise known as the Boot Sale Queen) on the phone, and was telling her that there was a load of new stuff, in this Charity Shop. She loves a bargain. Tash said she was going to call in there, when she picked the kids up from School. I decided that I'd go back down as well and have a good look at this table. As I'd been thinking that, it would make a great addition to my craft space. I think its a 1950 Utility table. But has a Formica top, so easy to wipe down.
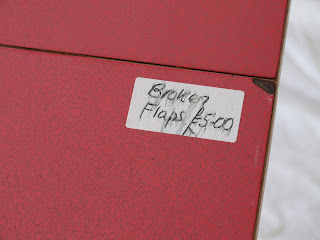
By the time I got there, Tash was already in the shop, and I could see her through the window. She was mouthing to me "Broken Flaps" and smiling. I looked at the table, and saw the sticker on the table saying "Broken Flaps". I look back at Tash through the window, and she again mouths broken flaps.
Well me being me, I saw the funny side, by the time I walked into the shop so had Tash, and we just looked at each other and burst into Hysterical Laughter. We did get some odd looks.


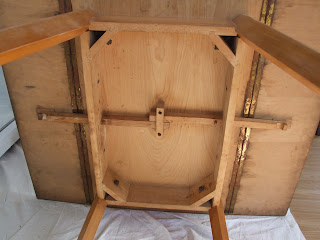
Needless, to say, I still brought the table and I've fixed my broken flaps. I just took a hammer to the wood underneath...

Coming Together...


The next job on the agenda, after all that painting was to get some power. Everything got measured and the back boxes went up on the walls. I had them placed high, so that I wouldn't be scrabbling about on the floor and that the sockets didn't get covered by any units. Once all the cables had been run, on the 29th February, they were connected up to a consumer unit. Then we laid the flooring. The underlay, also acts as insulation. I was lucky, as we had quite a lot of stuff already, that was left over from the House renovations, including the Floor underlay.
Electric Boxes Going Up

Side Wall Electric Boxes

Cables Being Run

Cables Connected Up To The Consumer Unit

Electrics Finished

Underlay & Flooring Going Down

Flooring Nearly Finished

Flooring Nearly Finished

Flooring Finished